Now that we’ve completed the first part of this guide, MikroTik: Setup A Client-to-Site SSTP VPN (Part 1), we’ll be moving forward with the client-side setup & configuration for ClientX. I’ve chosen to utilize Microsoft’s Connection Manager Administration Kit (CMAK) to setup and configure the SSTP VPN for ClientX because it allows a simple way to modify the Microsoft Windows route table post VPN connection, which will allow ClientX to take advantage of VPN Split Tunneling. Split Tunneling enables the client to route traffic destined for a specific subnet (SiteX’s local subnet) out a specific gateway (VPN gateway), while all other internet traffic defaults to the clients’ local gateway. In addition, CMAK allows administrators to create executable files that can be used to easily deploy the VPN to remote clients.
Install The Connection Manager Administration Kit (CMAK)
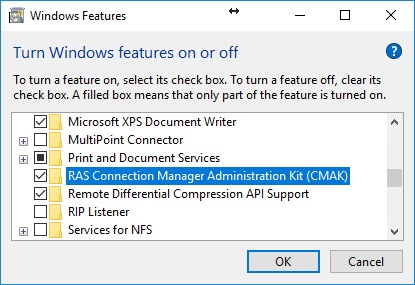
Again, ClientX is running Microsoft Windows 10. However, we’ll first need to install and configure CMAK on a separate machine, preferably one used for management. In this guide, I used my home PC running Microsoft Windows 10. In the Windows 10 Control Panel, open “Programs and Features”. Select “Turn Windows features on or off, tick the “RAS Connection Manager Administration Kit (CMAK)” option and click the “OK” button.
Configure/Create The VPN Package Via CMAK
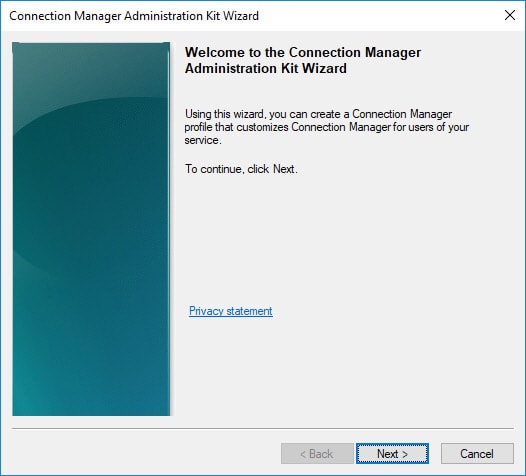
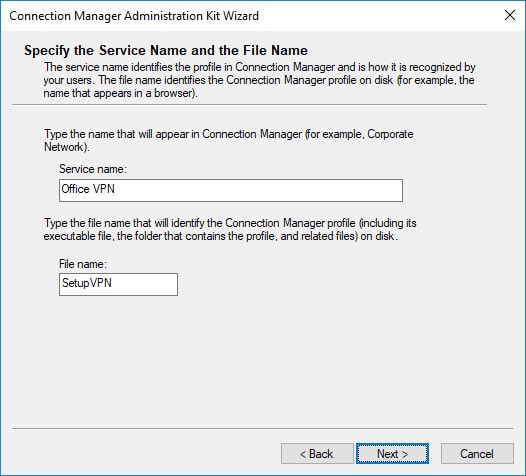
Now that the CMAK is installed we can now launch the application. In the Control Panel, select “Administrative Tools” and open the “Connection Manager Administration Kit”. This will start the CMAK wizard where we will configure the SSTP VPN settings and create the installer package for ClientX.
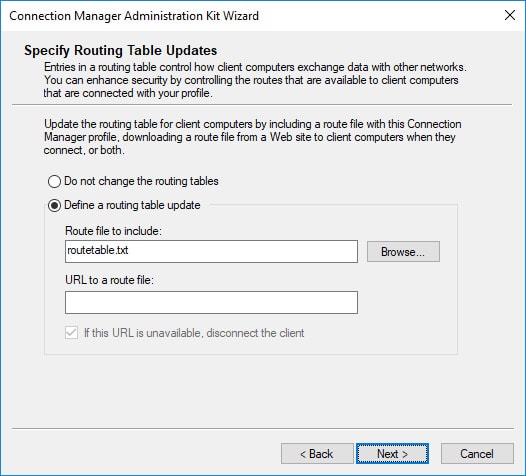
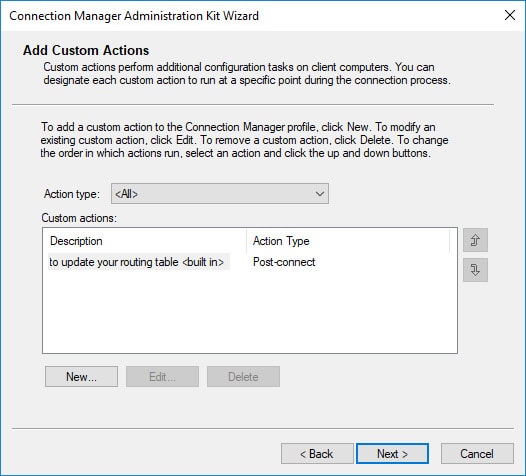
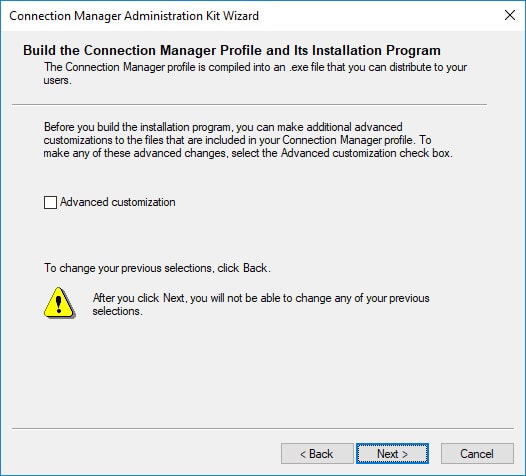
As you have probably noticed, most of the setup so far has been straightforward. However, for this next part, we will need to briefly pause where we are at in the CMAK wizard to create a txt file that will be used for the post-connection route table entry. Meaning, the route table will be modified after successfully connecting to the VPN. This will enables split tunneling for ClientX.
Create a blank txt file.
Copy and Paste the command in the code box below into the blank txt file.
Save the text file as “routetable.txt” to a location of your choosing.
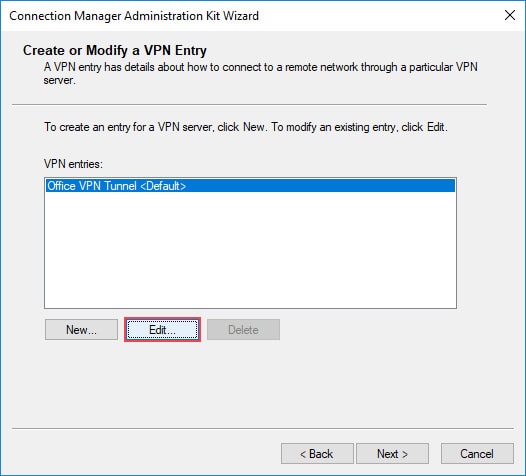
In the CMAK wizard, select “Define a routing table update” and click Browse to select the routetable.txt that was previously created.
Click the “Next” button to continue the CMAK wizard configuration/setup.
ADD 192.168.100.0 MASK 255.255.252.0 default METRIC default IF default
The above command can be broken down as follows: Command DestinationMASKNetmask GatewayMETRICMetricIFInterface
Keep in mind that you will need to change the destination and subnet mask as needed. In this guide, 192.168.100.0 is the SiteX’s private network, which the VPN has access to. This will allow ClientX to access resources on the 192.168.100.0 network, while traffic destined for any other network will use ClientX’s local gateway.
Install The VPN Client
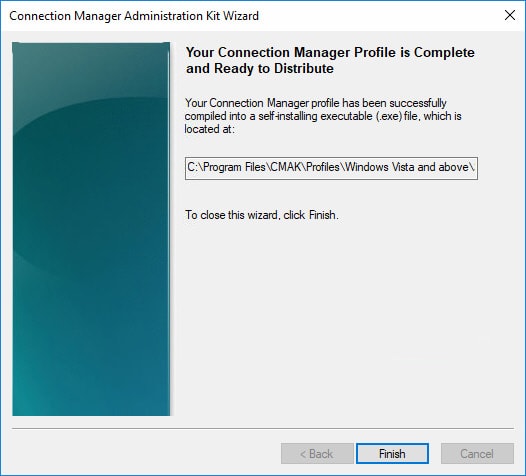
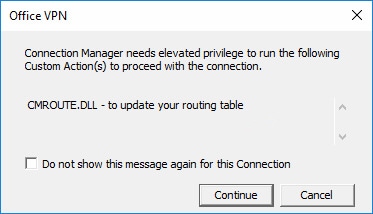
After completing the CMAK wizard, open the Windows File Explorer, navigate to “C:\Program Files\CMAK\Profiles\Windows Vista and above\SetupVPN\” and run SetupVPN.exe to begin the installation.
4 thoughts on “MikroTik: Setup A Client-to-Site SSTP VPN (Part 2)”
Iman Risardi
Marthur,
Thank you so much for this posted article. Your split connection tunneling article works out of the box. The only thing missing in the first part of the SSTP article, which are also missing in buncha youtube videos and articles is that the server part of certificate should be imported via Install Certificate wizard but be put into Personal folder rather than Trusted Root Certificate Authority. Plenty or articles describe so many variations between using CA, Server and Client to just CA and server to CA and client. I prefer CA and clients as I found it the hardway that after I imported the server certificate to Personal folder, BANG!, it worked! So maybe a better wording is literally signing and distributing one certificate for one client is the way to go. If you could put that there, your article is 100 out of 100! But again, it depends whether one wants ad-hoc clients VPN or site-to-site VPN.
Thank you so much, man!! if you’re in melbourne, email me, beer is on me. Write some more articles on Mikrotik, mate!!
This is great! Thank you.
I ran into an issue on the client – it asked me to select my modem –
I must have missed somewhere to use my existing connection?
I found issue – I did not copy the whole folder over – so INF file was missing on client PC. Copy entire folder and then run the EXE.
Correct the entire folder needs to be copied. I’ll make sure to update the post to include this. Thank you for pointing this one out.