Pi-hole’s primary role within a private network (e.g. home network) is to act as a DNS sinkhole/DNS Blackhole for domain names. Pi-hole is used to block ads, trackers/telemetry, and malicious domains – just about anything one would want to block, as long as it’s a domain name. I’ve been using Pi-hole for about two years now, which would be about a year after it was first released. It’s an amazing tool for anyone, not just the security conscious. Here recently, I’ve had numerous acquaintances, friends, and co-workers ask me how I handle security/telemetry blocking at home and Pi-hole was a big part of that discussion, including how to setup and configure Pi-hole. Pi-hole’s setup and configuration is simple and fairly straight forward. However, keep in mind that in this guide the Pi-hole installation will be on a Raspberry Pi B+ running Raspbian Stretch Lite for the operating system. If you need assistance in setting up your Raspberry Pi with Raspbian Stretch Lite, please see my guide, “Raspberry Pi: Setup and Configuration“. Lets get started!
Pi-hole Setup & Configuration
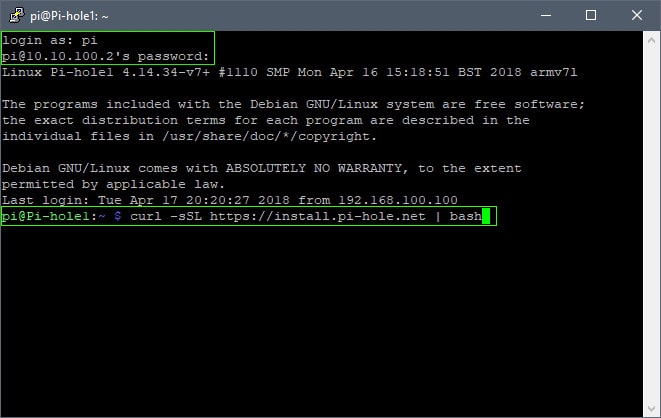
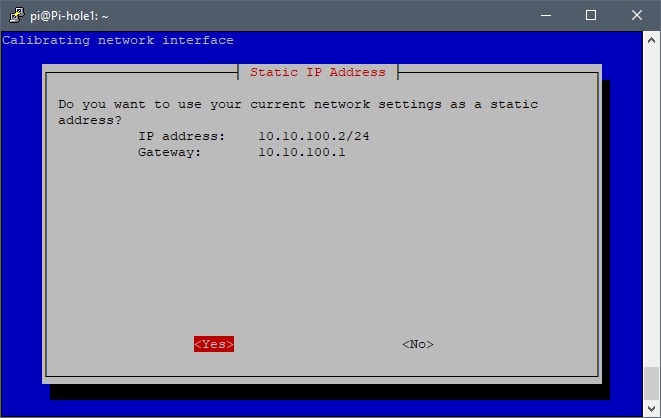
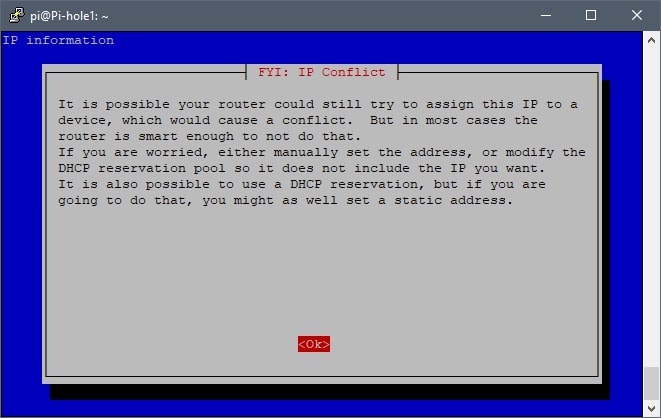
Assuming you’ve completed my previous guide, “Raspberry Pi: Setup and Configuration,” you should already know the Pi-holes IP address. This is optional, but if you have not already set a static IP address or DHCP reservation for the Raspberry Pi, do so now and reboot the Raspberry Pi using the “sudo reboot” command.. Afterwards, launch Putty to connect/login to your Raspberry Pi and run the following command in the terminal to begin the installation:
curl -sSL https://install.pi-hole.net | bash
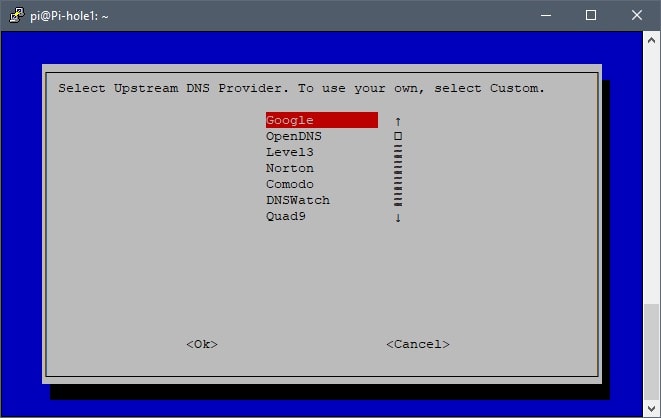
The majority of setups would most likely use one of the available DNS providers in the list. However, I’ve chosen to use my router as the “Custom” DNS provider, but choose what best suits your environment/preference. What’s important here is that the Pi-hole receives DNS requests directly from the clients on the network so that the Pi-hole can collect/display DNS statistics for each individual client. However, If the router is sending DNS requests to the Pi-hole on behalf of your clients, the Pi-hole will be unable to display statistics for each individual client on the network. Instead, the Pi-hole will display all DNS statistics coming from the router, instead of each individual client. This is why it’s important to statically or dynamically set client DNS addresses to the Pi-hole’s IP address.
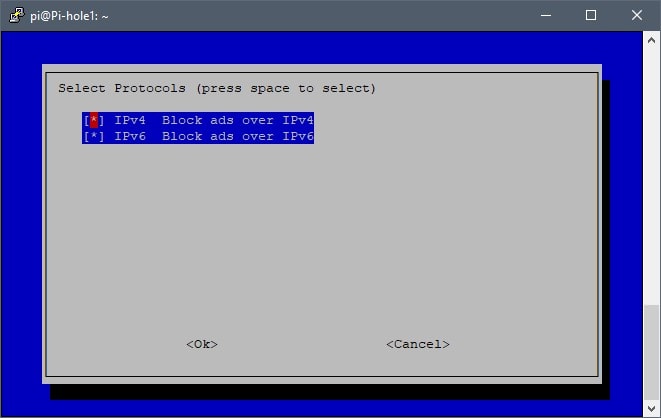
By default, both IPv4 and IPv6 are enabled. However, my ISP is not currently assigning IPv6 addresses to their customers and so I have IPv6 disabled on both my router and the Pi-hole. This setting will depend primarily on your environment, just keep that in mind.
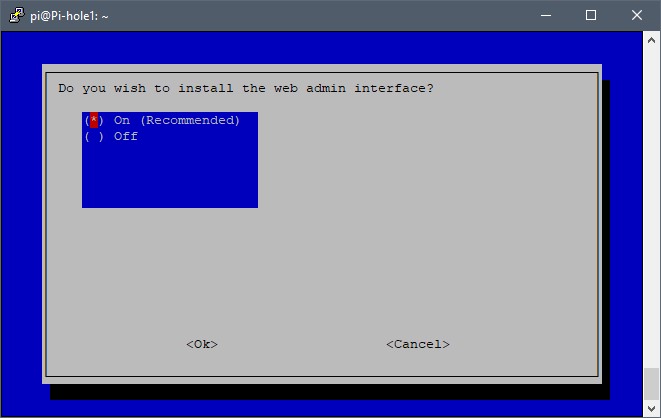
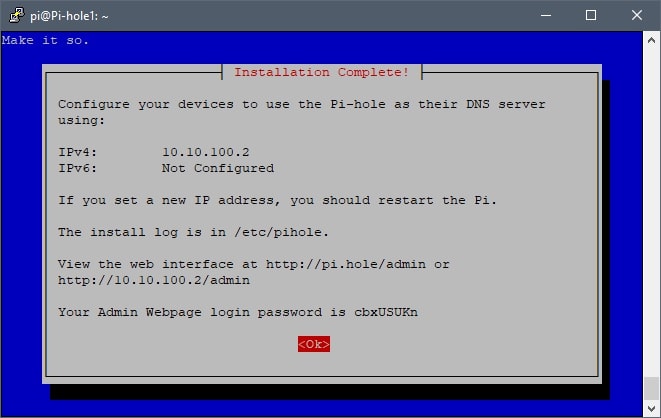
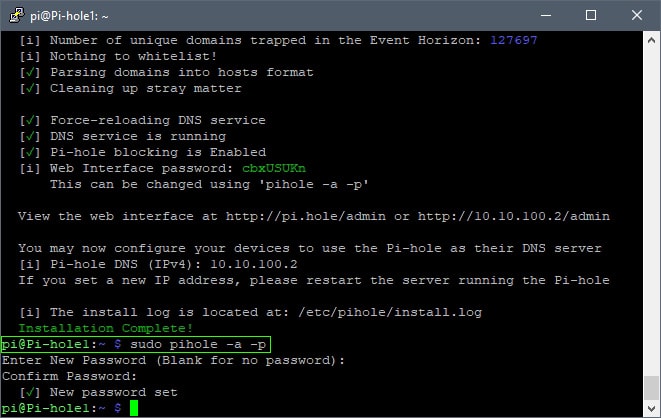
Take note of the web interface address (e.g. http://10.10.100.2/admin). This is the address used to access the Pi-hole via browser. In addition, a randomly generated password is also provided, use this password to login to the Pi-hole.
The Pi-hole password can be changed by running “sudo pihole -a -p” in the terminal. Now that the Pi-hole installation is complete, configure the devices on your network to use the Pi-hole as their DNS server.
Pi-hole FTLDNS and Unbound
Pi-hole v4.0 was released with FTLDNS and Unbound. By default, Pi-hole will act as a “forwarding” DNS server. However, when using FTLDNS and Unbound, Pi-hole will act as your own local “recursive” DNS server. This is similar to running your own in-house/local Google or Cloudflare DNS server. Why use Pi-hole as a recursive server?
Privacy – as you’re directly contacting the responsive servers, no server can fully log the exact paths you’re taking, as e.g. the Google DNS servers will only be asked if you want to visit a Google website, but not if you visit the website of your favourite newspaper, etc.
For a more detailed explanation, visit Pi-hole.net’s blog post, FTLDNS and Unbound Combined For Your Own All-Around DNS Solution, which covers the differences between having Pi-hole as a forwarding DNS server vs a recursive DNS server. Furthermore, if you’re interested in making the switch, the following guide explains how to configure Pi-hole to use FTLDNS and Unbound: Pi-hole as All-Around DNS Solution.